So, you’ve got some data in your Azure DevOps project that you’d like to get out and turn into a bespoke report?
Our requirement was fairly basic, to produce a simple report where customers can see when certain features are going to be released and what is being worked on in a particular Sprint.
The team had created a Query within Azure DevOps that listed out the Sprints/Iterations, Work Items and their State. The only difficulty was getting that information out into an On-Premise SQL Server database. The only obvious route within Azure DevOps was to export the results as a CSV file and then import it into SQL…not great!
Surely there had to be a way to “Automate” this?
Step in Power Automate.
How did we do it?
We started with creating a Scheduled flow from blank, giving it an name and setting the frequency of when the flow would trigger. If you leave the Flow name blank, one will be created for you.
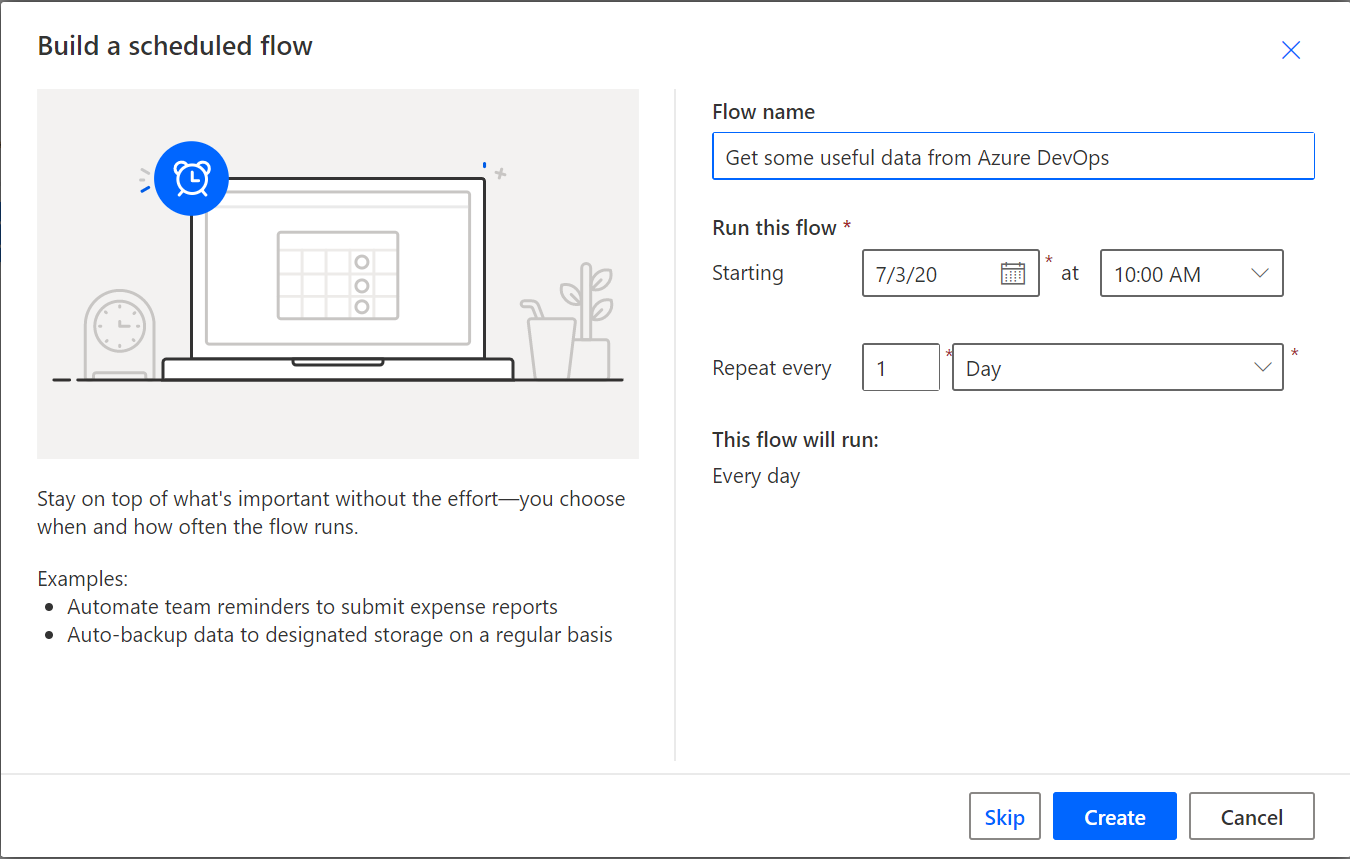
You’ll get your first step automatically created for you called Recurrence. You can click on this step and change the frequency at any time.
To get the Query results from Azure DevOps, we inserted a new step and added a new Action. We then searched connectors and actions for Azure DevOps and scrolled through the list and selected Get query results. You can click on Azure DevOps and this will filter the list of results to the triggers and actions available for Azure DevOps.
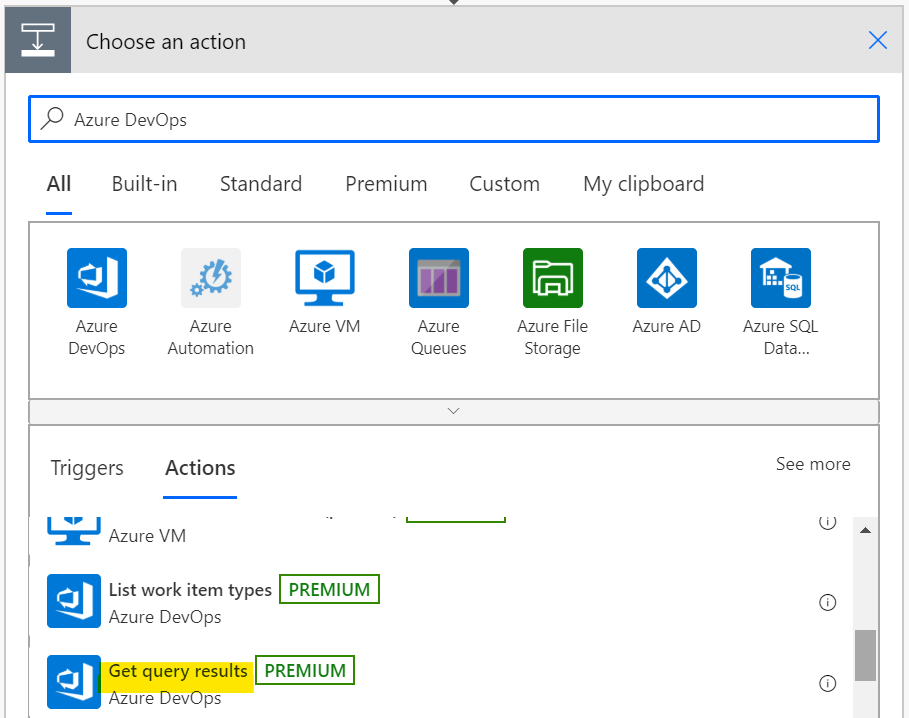
Here it was just a matter of entering the Organisation Name and Project Name. You’ll be asked to authenticate with Azure DevOps in order to list out the queries within your project. You’ll have access to your queries and any shared queries.
Next up was interacting with the On-Premise SQL Server where the data was being stored.
In order to access the On-Premise SQL Server we needed to create a data gateway. You can find out how to install and configure the data gateway here.
Once that was set up and configured, we could then create a new connection to our SQL Server. After clicking ”+ New connection” within Data -> Connections, we chose SQL Server. From there we set the appropriate SQL Authentication credentials, database details and selected the data gateway created previously.
Back in our Flow, we added a new step for a SQL Server action and selected the Execute stored procedure (V2) action. We already had a stored procedure which cleared down the table we would be interacting with, so selected the connection we just created and picked our stored procedure.
The next step was to process the Azure DevOps query results. For this step we used the SQL Server Insert row (V2) action.
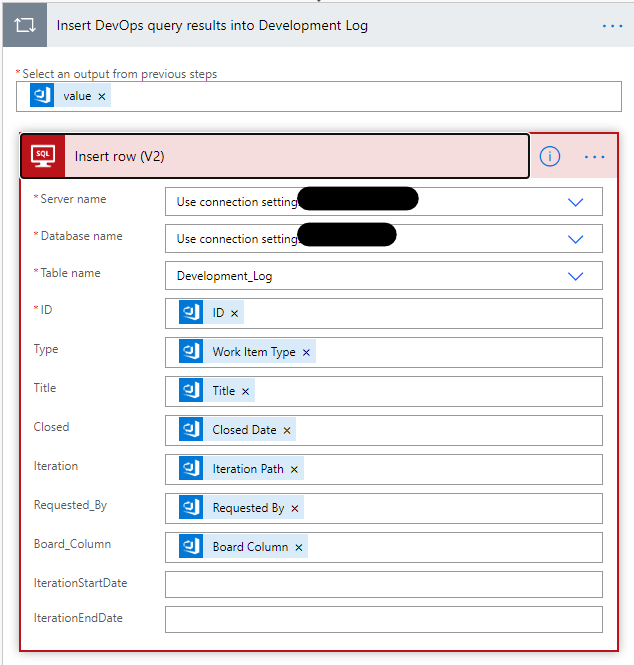
This next bit is the bit I love about Power Automate; Dynamic Content. This dynamically picks up references to fields/outputs from previous steps and also allows you to create expressions with that content.
As you can see from above, for the output from the previous step we selected the value which is the result of the Azure DevOps query.
The insert row action presents us with the structure of our table where we can map the relevent fields from the query results to our table columns.
You’ll notice that we’ve not set the Iteration Start and End Date. The reason being that we couldn’t seem to get to those dates via the query (can this be done?). So what to do?
Step in Azure DevOps - Analytics
You can find an explanation of Analytics and what it can do here. The bit we’re interested in is OData queries.
In order to get the data out via Analytics we needed to create a Personal Access Token in Azure DevOps.
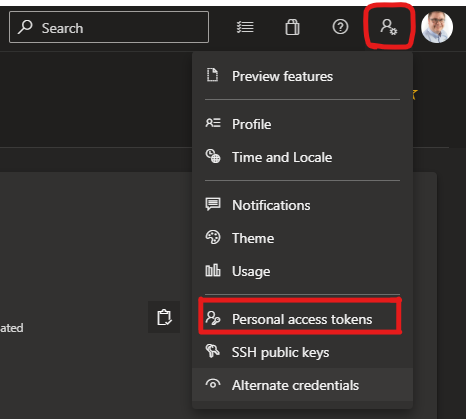
Here we created a +New Token, giving it an name and setting the Organisation and Expiration details as required.
Next we set the Scope of the Token.
We left it as a custom defined Scope, clicked Show all scopes, checked Read against Analytics and clicked Create.
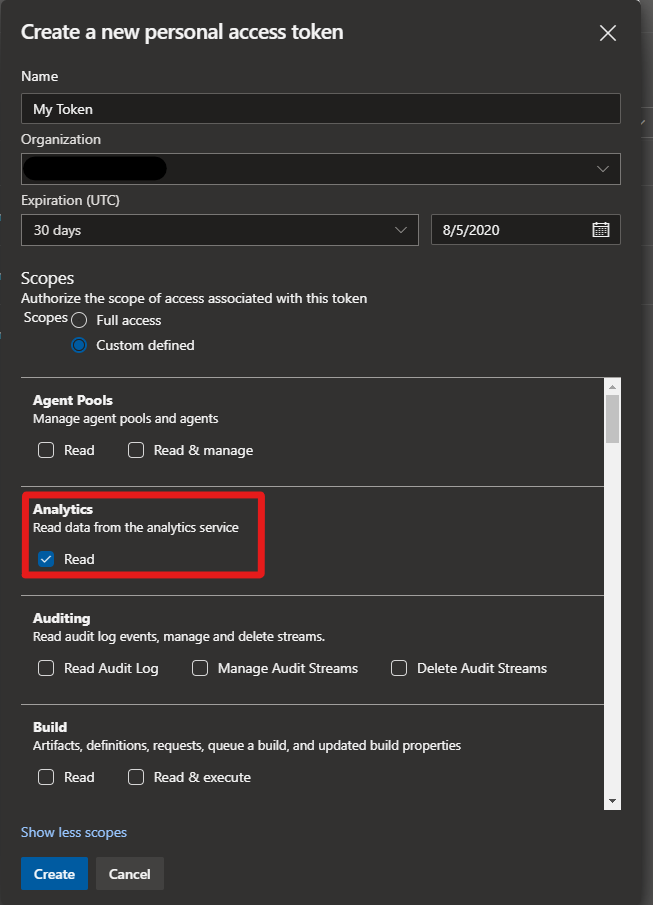
Make sure to note your new token as you’ll need it later.
Now we have our Personal Access Token, we can create a new step in our Flow and add a HTTP action to get the OData from Analytics.
The following link provides guidance on how to create OData queries.
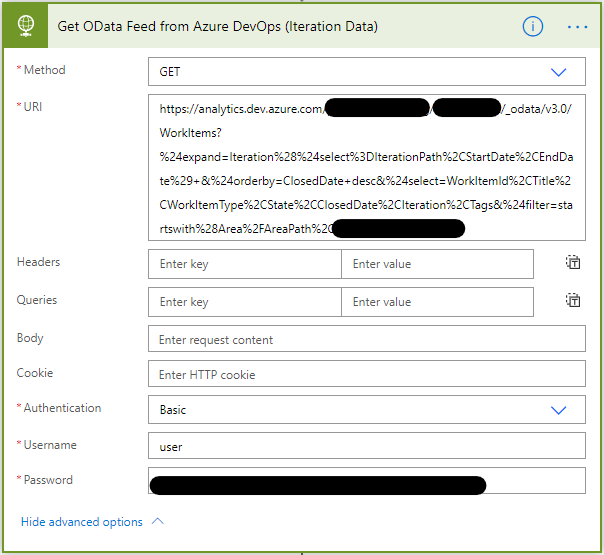
The main point to note here is that you will need to set some basic authentication credentials in advanced options, which are defined below:
- Authentication = “basic”
- User = “user” or “test”
- Password = [The Personal Access Token you created earlier]
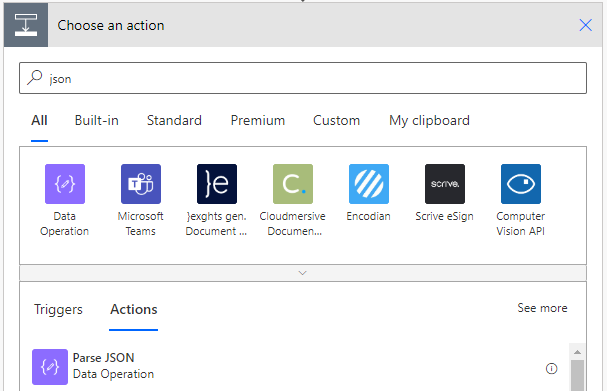
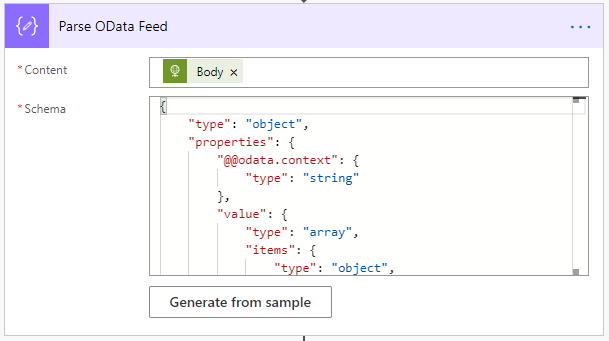
In the next step of the Flow, we added an action to Parse the JSON result from the OData query.
Using dynamic content, we selected the Body from the previous step as our Content for this step.
To get the Schema, we used Generate from sample and pasted in the data returned from the OData query. You can get this by running the query through Postman or browser.
Now to push that data into our On-Premise SQL Server.
In our final step, we added an action for Apply to each. We selected value from our previous step as the Content for this step.
Within this step we added an additional action for Execute stored procedure (V2). Here we specified the SQL Stored Procedure that would insert the data into the table and set the appropriate values.
In our example, the WorkItemId was at the top level of our OData output so we could select it outright within dynamic content.
Getting the Iteration Dates was a little different. Here we used expressions to get data from the nested Iteration data - see below:

And that’s it. Manually triggering our Flow we could see the data was now Flow-ing into our On-Premise SQL Server.
Caveat: This did take a few evenings to get this up and running, so thought it would be worthwhile documenting our journey just in case anyone else wanted to pull data from Azure DevOps in this way.
Now, I appreciate there are probably many ways that this could have been achieved and maybe in fewer steps too. If so, I’d be happy to hear from you!
Thanks for taking the time to have a read.